

Installation of permeable interlocking pavers: the Lavé-Uni Montréal method (step by step)


More and more municipalities are requiring rainwater management at the source , directly on your property. In Montreal, areas like Outremont and Rosemont encourage (and sometimes require) measures that reduce runoff into streets and sewers.
Permeable interlocking pavers are a simple solution to understand, but technically challenging to implement: water passes through the joints, flows down into a drainage base, and then gradually infiltrates the soil. The result: fewer puddles, less ice, and a more stable structure.
Why choose a permeable installation?
• On-site stormwater management (less runoff)
• No (or very little) water accumulation on the surface
Less ice in winter : the water doesn't stagnate
• Improved freeze/thaw resistance : the underlayment remains drier
• Less movement : the structure remains stable
Less maintenance than traditional polymeric sand (the joints are made of clean stone)
Basic principles for parking
• Total excavation: 24 inches
• Granular foundation: 21 inches
These depths can vary depending on the soil, the load (entrance vs patio), and the site constraints, but here is the basis of our method.
Step by step: our installation method
1) Excavation to the correct depth
We excavate to a depth of approximately 24 inches to make room for the complete drainage structure.
2) Management of existing materials
• Transport and disposal of existing asphalt and concrete (if present)
• Transport and disposal of contaminated gravel (0–3/4)
Objective: to start again on a clean, stable base compatible with a permeable structure.
3) Soil separation: geotextile membrane
A geotextile membrane is installed between the natural soil and the foundation.
It prevents the migration of fine particles (clay/earth) towards the clean stone.
It protects the drainage capacity over time.
4) 3/4 net (16 to 17 inch) stone drainage sub-foundation
Add 16 to 17 inches of 3/4 net gravel .
This is the “reservoir”: it temporarily stores the water before it seeps in.
5) Layered compaction (and woven membrane)
It is compacted in successive 6-inch layers .
· A woven membrane is added every 6 inches.
· Then we compact again
This approach improves the stability and structural performance of the whole.
6) Final compaction of the foundation
We ensure that the foundation is adequately compacted and uniform.
This is a key step: a poorly compacted foundation = movements, subsidence, level problems.
7) Setting layer: fine clean stone (1/4)
Add approximately 1 inch of fine clean stone (1/4) .
It helps to adjust the leveling while maintaining permeability.
8) Bedding layer: fine clean stone (1/8)
Next, about 1 inch of fine clean stone (1/8) is added.
This is the bedding layer on which the paving stones will be installed.
9) Installation of the paving stones
The paving stones are installed according to the chosen pattern, respecting:
• Slopes and levels
• The alignments
• The necessary boundaries/constraints (according to the design)
10) Joint filling + final compaction
The joints are filled with 1/8 stone , then the final compaction is carried out.
Unlike polymeric sand, clean stone allows water to continue flowing through the system.
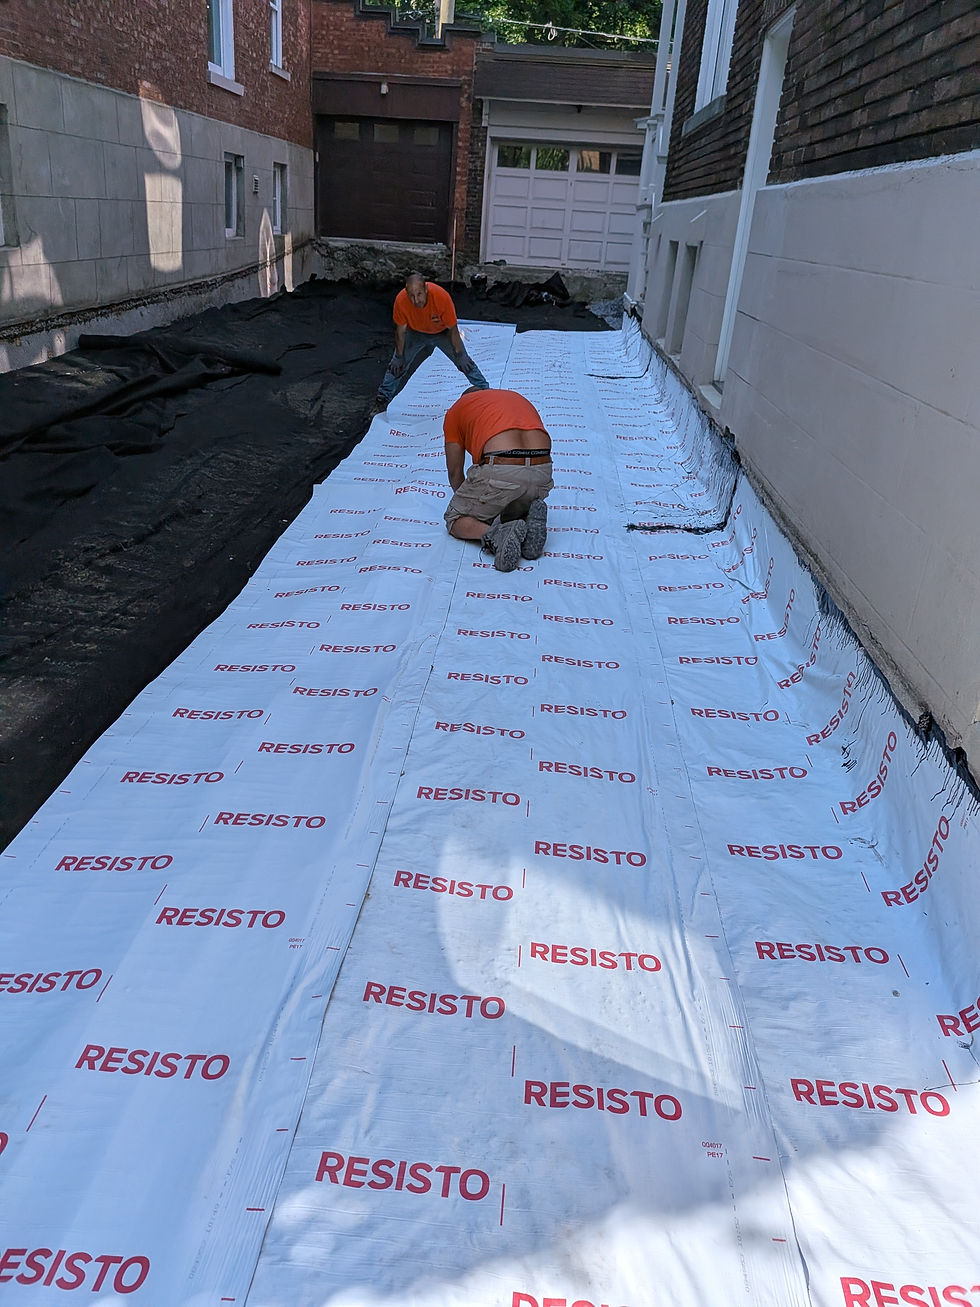
Isolated cases: foundation protection option (EPDM membrane)
In certain contexts (proximity to the house, soil conditions, specific water management), an EPDM membrane may be recommended to protect the foundation.
Steps (summary)
1. Prepare the excavated surface: compacted, leveled, free of debris/sharp objects.
2. Install a protective layer (geotextile or protective underlayer).
3. Unroll and position the EPDM membrane on the horizontal surface.
4. Bring the membrane up over the foundations for about 24 inches (2 feet) all the way around.
5. Adjust/pleat to avoid tension.
6. Make the joints/connections with EPDM glue/adhesive.
7. Seal the joints and critical points.
8. Add an additional protective layer over the membrane.
9. Then resume construction of the granular foundation according to the specifications.
Recommended option: protective & stabilizing treatment (joints and paving stones)
To improve durability and limit maintenance, a protective/stabilizing treatment can be added.
• Application by spray
• Finishing with a sponge roller
What it really changes on a daily basis
Fewer puddles after the rain
Less ice and slippery areas in winter
• An entrance/patio that remains more stable throughout the seasons
• Fewer joint repairs compared to a traditional installation
Need a diagnosis for your land?
Every site is different (soil type, slope, proximity to the foundation, existing drainage). If you are in Montreal (Outremont, Rosemont, West Island, Laval, North Shore), we can assess the feasibility and propose a suitable solution.


Comments